


How Do You Refill Toner Cartridges?
How Do You Refill Toner Cartridges?
That blinking 'Low Toner' light can feel like a countdown to an expensive purchase. A new cartridge can easily cost $75, but what if you could solve the problem for about $15? Refilling your own toner is a popular way to slash printing costs, but the real question is: is it worth it, or are you just setting yourself up for a messy headache?The answer comes down to a simple trade-off. You are exchanging 30-45 minutes of your time for a savings of $60 or more. For many, that’s a fantastic deal. The most significant catch, however, involves your printer’s warranty. Most manufacturers clearly state that using unofficial refills can void it, a critical factor if your printer is still new.
Before you decide, here is the honest breakdown of the pros and cons:
Pros: Significant cost savings and a lower environmental impact.
Cons: Requires time and prep, potential for mess, and may risk your warranty or print quality.
Your Toolkit: The 5 Essential Items for a Clean and Successful Refill
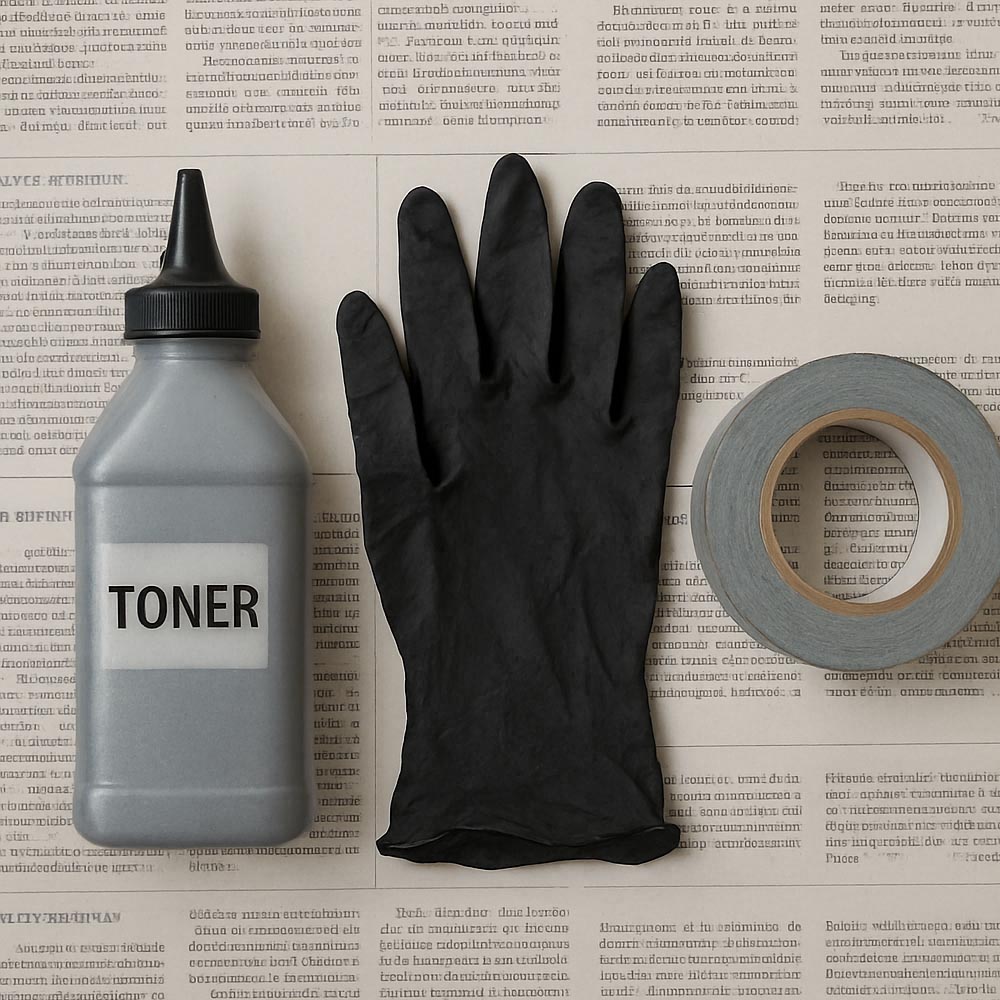
Getting the right gear is half the battle. Thankfully, the list of tools is short and simple. Before you start, gather these five essential items to ensure the process is quick and, most importantly, mess-free. Most items are included in universal toner refill kits.Toner Refill Bottle (with funnel cap)
Hole-Making Tool (if needed)
Duct Tape or Sealing Sticker
Disposable Gloves
Newspaper or Plastic Sheeting
Your toner bottle must have a screw-on funnel cap; this is critical for pouring the fine powder without creating a dust cloud. Some cartridges don’t have a built-in fill plug, which is where the hole-making tool comes in. It’s a simple, heated device that cleanly melts a perfect circle for you to fill through, preventing plastic shavings from contaminating your cartridge. A quick check of your cartridge will tell you if it has a removable plastic plug or if you’ll need to make your own entry point.
Part 1: How to Prepare and Open Your Cartridge Safely
With your workspace prepared and gloves on, your first task is finding the fill opening. On many cartridges, like those for Brother printers, you’ll find a simple plastic plug you can pry open. Others, especially many HP and Canon models, require using your hole-making tool to melt a clean, circular opening into a spot on the cartridge body, which is usually marked with a small indentation.Before adding new toner, you must empty the old waste. Every cartridge has a waste hopper—its internal trash can for excess toner from previous print jobs. If you skip this, the overflowing powder will cause ugly gray streaks and smudges on your pages. You'll typically find a separate plug to empty this compartment; be sure to do this over your newspaper, as this old toner is what makes the biggest mess.
Finally, you will see a shiny roller, usually green or blue. This is the imaging drum, and it’s the most delicate part of the unit. Think of it as a precise stamp that transfers the image to the paper. Touching the surface with your fingers or exposing it to bright light can permanently damage it, leading to lines or spots on every page. Always hold the cartridge by its plastic frame to keep this drum safe.
Part 2: How to Add New Toner and Seal the Cartridge
With the waste hopper empty, you're ready for the main event. Screw the funnel cap onto the new toner bottle and insert its tip into the fill hole. The secret to a clean fill is to avoid squeezing the bottle, which can create a messy puff of powder. Instead, gently tap the side of the bottle, allowing the toner to flow smoothly like sand in an hourglass.Continue this tapping motion until the powder level reaches the bottom of the opening. Most refill kits come pre-measured for a single cartridge, so you can typically empty the whole bottle. Forcing too much toner in can lead to clogs and streaky prints, so stop as soon as it appears full.
Creating a secure seal is crucial to prevent leaks inside your printer. Carefully wipe any stray powder from around the hole with a dry cloth or paper towel. Peel the backing off the circular foil sticker from your kit and press it firmly over the hole. If you don't have a sticker, a small piece of quality electrical or duct tape will work just as well to create a reliable, leak-proof patch.
Troubleshooting: Why Your Printer Still Says "Empty" and How to Fix It
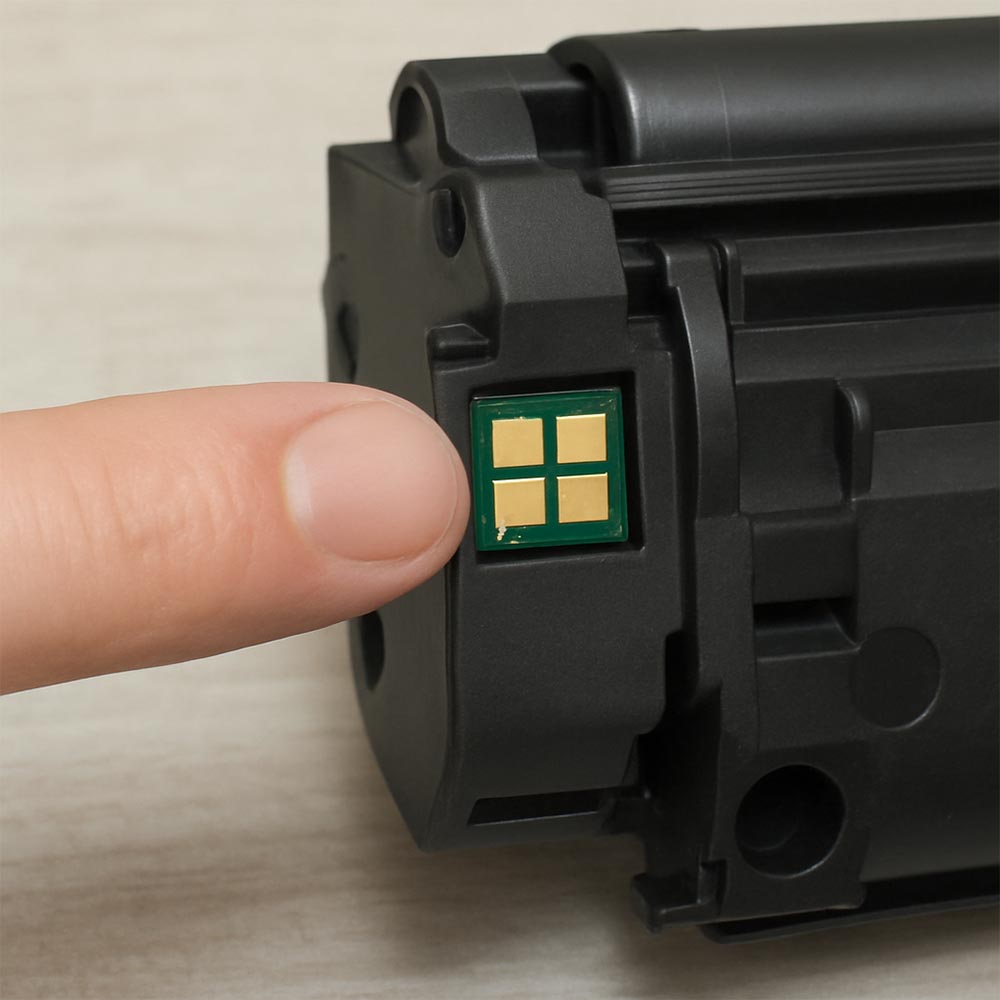
After carefully refilling your cartridge, it can be frustrating to see the printer still flashing a "Low Toner" warning. This isn't your fault. Most cartridges have a small "smart chip" that counts the pages printed. Think of it like a gas gauge that only counts down; once it hits zero, it tells the printer the tank is empty, regardless of how much toner is actually inside.
The fix is usually straightforward: you must replace this chip. Your refill kit should have included a new one, which looks like a tiny circuit board. On the side of your cartridge, you'll find the old chip, which can typically be pried off with a small flathead screwdriver or simply slid out of its housing. Just pop the new one in its place, ensuring it's oriented the same way, and your printer will now see the cartridge as full.
The Final Verdict: Is DIY Toner Refill Your Smartest Move?
That blinking "Low Toner" light is no longer a command, but a choice. So, is it worth it to refill toner cartridges?If saving over $50 for 30 minutes of careful work sounds like a great trade, the DIY path is likely for you. For a balance of savings and ease, you might compare a professional toner refill service vs. DIY. But if speed is everything and you don't mind the cost, buying a new cartridge remains your fastest option.
Ultimately, you are now equipped to manage your printing costs, reduce plastic waste, and see that once-expensive cartridge as a resource you can control.


