


How to clean a printer ink cartridge
How to clean a printer ink cartridge
Seeing streaks, blank spots, or faded colors on your prints? A clogged ink cartridge is usually to blame. Don't rush to buy a new one just yet—with a careful clean, you can often get it working perfectly again. This guide covers the safest ways to clean your ink cartridges, which can save you money and extend their lifespan.
Play It Safe & Check First
Before you start, get your setup right and make sure cleaning is actually the solution.
Gather what you’ll need:
You don’t need special tools—just a few everyday items:
Distilled water or isopropyl alcohol: Distilled water works for most clogs. For tough, dried-on ink, use 90%+ isopropyl alcohol.
Lint-free cloths or coffee filters: These won’t leave fibres behind. Paper towels tend to shed lint.
Shallow dish or paper plate: For holding your cleaning solution.
Latex or nitrile gloves (optional): Keep ink off your hands.
Plastic wrap: Helps create a damp chamber for stubborn clogs.
Start with your printer’s built-in cleaning cycle:
Often, your printer’s own maintenance routine can fix the problem.
Open your printer software on your computer (“Devices and Printers” on Windows, “Printers & Scanners” on Mac).
Look for the Maintenance or Utility tab.
Run a Nozzle Check pattern to see where the issue is.
If the pattern has gaps, run a Print Head Cleaning cycle (1–2 times). Wait a few minutes between cycles.
Method 1: Cleaning the Outside & Electrical Contacts
This helps fix poor communication between the cartridge and printer, which sometimes causes errors.
Step-by-step:
Remove the cartridge: Turn your printer on and open the cartridge access door. Gently press the release tab to take the cartridge out.
Find the contacts: Look for the small copper-coloured contact points on the cartridge and the matching ones inside the printer.
Clean gently: Dampen a corner of your lint-free cloth with distilled water. Wipe the cartridge contacts lightly. Then use a dry part of the cloth to wipe the contacts inside the printer—don’t spray anything in there.
Let it dry completely: Make sure all contacts are 100% dry before reinstalling. Any moisture could cause a short circuit.
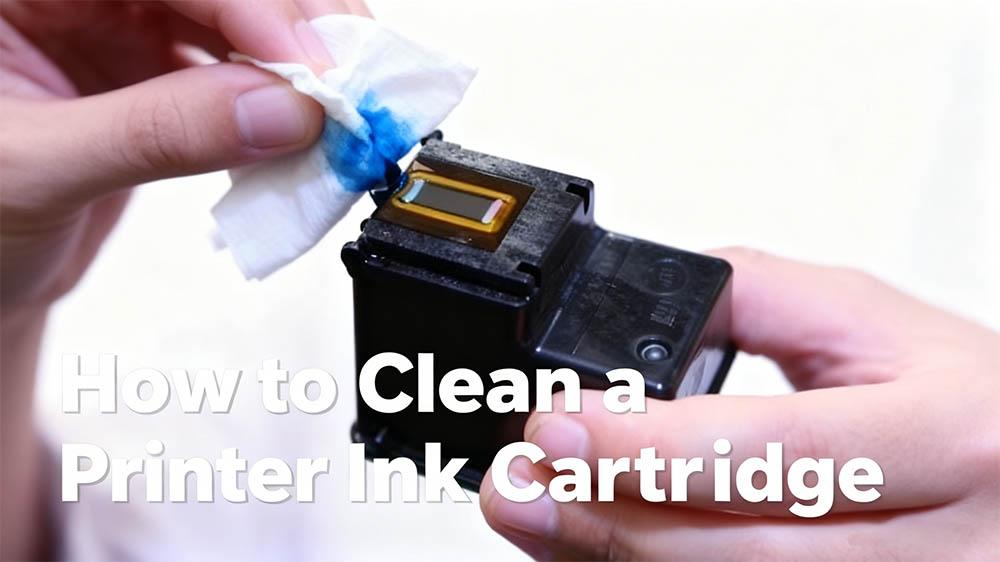
Method 2: Deep Cleaning the Ink Nozzles (For Clogs)
Use this method if your cartridges have built-in printheads (common in Canon and HP models).
The soaking method:
Prepare your solution: Pour about ½ inch of warm distilled water into a shallow dish. For stubborn clogs, mix 3 parts distilled water with 1 part isopropyl alcohol.
Position the cartridge: Place the cartridge so only the nozzle plate (the thin metal strip with tiny holes) is submerged. Don’t let the whole cartridge or the electronic contacts get wet.
Soak: Leave it for 5–10 minutes. For really tough clogs, you can soak for up to 30 minutes—just check on it now and then.
Dry and test: Gently pat the nozzle plate dry with a lint-free cloth. Reinstall the cartridge and run another nozzle check pattern.
Keep Your Cartridges Clean in the Long Run
Print regularly: Run a small colour test page at least once a week to keep the ink flowing.
Store cartridges properly: If you’re removing one, place it in an airtight bag with a lightly damp paper towel and store it nozzle-down.
Choose original or high-quality compatible ink: Cheaper inks can clog more easily.
Wrapping Up
Cleaning your ink cartridges is a simple, cost-effective way to maintain your printer. Start with your printer’s own software tools, then try gently cleaning the contacts. If clogs persist, a careful soak of the nozzle plate often does the trick. Follow these steps—and avoid the common pitfalls—and you’ll likely revive a cartridge you thought was finished, getting you back to crisp, clear prints in no time.
If cleaning doesn’t work after 2–3 attempts, it’s probably time to invest in a new, high-quality cartridge. Your printer will thank you.


