


How to Clean the Drum on a Brother Printer?
source: Time:2025-07-28 views:364
How to Clean the Drum on a Brother Printer?
I. Introduction
II. Signs Your Brother Printer Drum Needs Cleaning
Recognizing when your drum needs attention can save you time and frustration. Here are some common signs that indicate it's time for a cleaning:
Faded or Streaky Prints: If your documents are coming out with uneven color or streaks, it's a clear sign that the drum needs cleaning.
Black Spots or Lines: Persistent spots or lines on your pages can indicate toner buildup on the drum surface.
Error Messages: Many Brother printers will display error messages related to drum maintenance when cleaning is necessary.
Ghosting: This phenomenon occurs when faint duplicate images appear on your prints, often due to toner residue on the drum.
III. Tools & Supplies Needed
Before you start cleaning, gather the following tools and supplies:
Lint-Free Cloth: A microfiber cloth is recommended to avoid scratching the drum.
Distilled Water or Isopropyl Alcohol: Use these to dampen your cloth for stubborn stains, but avoid harsh chemicals.
Cotton Swabs: Perfect for reaching tight spots and cleaning detailed areas.
Soft Brush (Optional): This can help remove excess toner dust from the printer.
IV. Step-by-Step Cleaning Guide
Step 1: Turn Off & Unplug the Printer
Safety first! Ensure that your printer is turned off and unplugged to prevent any electrical hazards or damage during the cleaning process.
Step 2: Open the Printer & Remove the Drum Unit
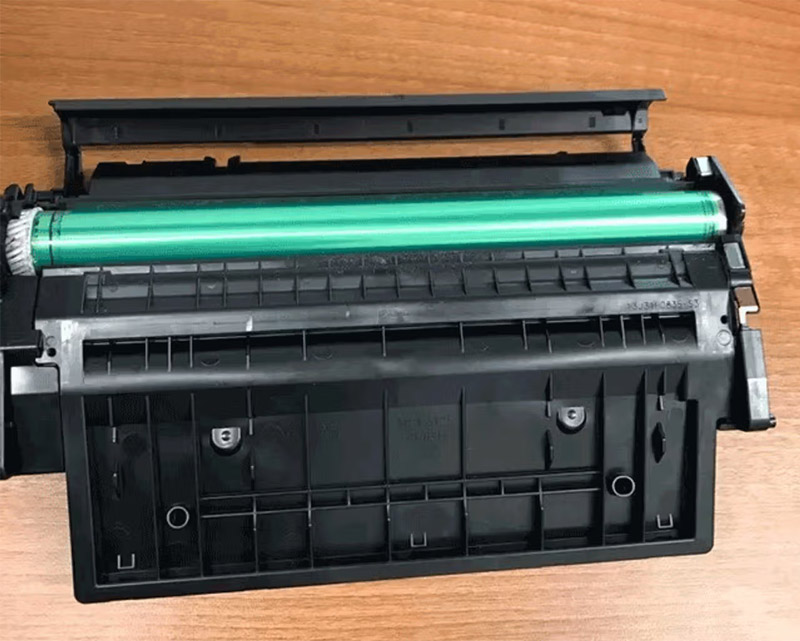
Locate the drum unit, which is typically found inside the toner cartridge assembly. Gently pull it out, following the instructions in your printer manual to avoid any damage.
Step 3: Clean the Drum Surface
Using a lint-free cloth, gently wipe the drum surface. Apply no excessive pressure to avoid scratching. If there are stubborn residues, lightly dampen the cloth with distilled water or isopropyl alcohol. For hard-to-reach areas, use cotton swabs to ensure a thorough clean.
Step 4: Remove Excess Toner Dust
With a soft brush, carefully clean the surrounding areas of the drum to remove any excess toner dust. Avoid blowing air into the drum, as moisture can lead to damage.
Step 5: Reinstall the Drum & Test Print
V. Maintenance Tips to Extend Drum Life
To ensure your Brother printer drum lasts as long as possible, consider these maintenance tips:
Keep the Printer in a Cool, Dry Place: This helps prevent overheating and moisture damage.
Avoid Touching the Drum with Bare Hands: Oils from your skin can damage the drum surface.
Replace the Drum When Necessary: If cleaning no longer improves print quality, it may be time for a replacement.
Follow Brother's Recommended Drum Replacement Schedule: Regularly check the manufacturer's guidelines for optimal performance.
VI. When to Replace (Not Just Clean) the Drum
Sometimes, cleaning isn't enough. Here are signs that indicate it's time to replace the drum:
Persistent Print Quality Issues: If cleaning does not resolve your print problems, replacement may be necessary.
Visible Scratches or Damage: Inspect the drum surface for any physical damage.
"Replace Drum" Error Message: If your printer displays this message, it's time for a new drum.
VII. FAQs About Brother Printer Drum Cleaning
Can I use regular alcohol to clean the drum?
It's recommended to use 90% or higher isopropyl alcohol for effective cleaning.
How often should I clean the drum?
Depending on usage, cleaning every 3-6 months is advisable for heavy use.
Does cleaning the drum reset the drum counter?
No, the drum counter remains unchanged, and replacement is still needed when prompted.
Shop Affordable Compatible Drum Units at Zhuhai Prime Color Image Company
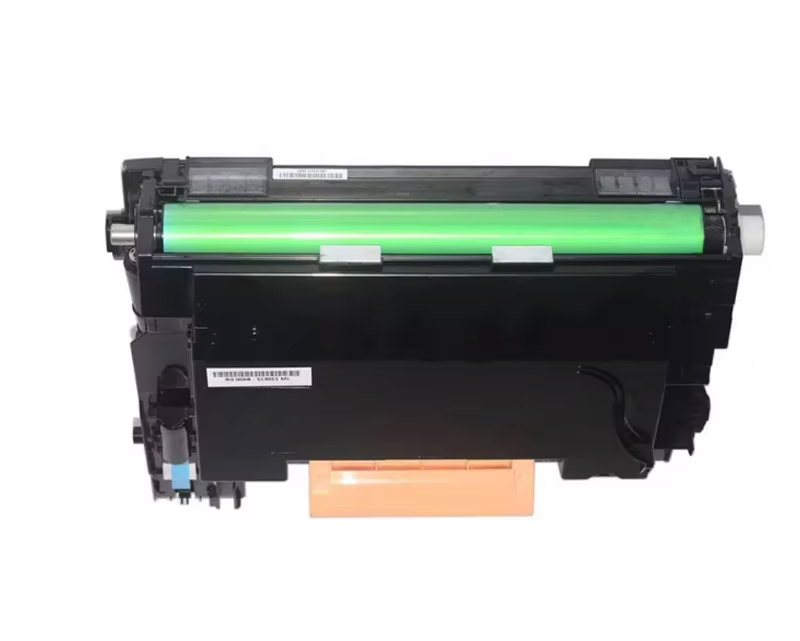
If cleaning your drum unit doesn’t fix the print quality issues or if your printer continues to show a drum error, it’s time for a replacement. At Zhuhai Prime Color Image Company, we provide high-quality compatible drum units at a significantly lower price compared to original OEM products.
Exceptional Page Yield: Our compatible drum units deliver the same page yield as Brother’s original products, ensuring reliable and long-lasting performance.
Competitive Pricing: Enjoy the same level of quality as OEM products, but at a more budget-friendly price, helping you save on printer maintenance costs.
Consistent Print Quality: Our drum units work flawlessly with toner cartridges, producing thousands of sharp, clear prints.
Easy Installation: Replacing a drum unit is as straightforward as swapping out an original drum—just remove the old unit, install the new one, and you’re ready to print.
Conclusion
Regular maintenance of your Brother printer's drum assembly is crucial for achieving optimal print quality and extending its lifespan. This guide provides you with effective cleaning techniques to keep your printer in top shape. If your drum is worn out and cleaning no longer enhances print quality, consider upgrading to a high-quality, cost-effective replacement from Zhuhai Prime Color Image Company.
I. Introduction
In the world of printing, the drum unit plays a crucial role in producing high-quality documents. This essential component transfers toner onto paper, ensuring that your prints are sharp and clear. However, over time, the drum can accumulate dust and toner residue, leading to issues such as streaks and spots on your prints. Regular cleaning of the drum is vital to maintain print quality and prolong the life of your printer. Before you begin, it's important to take safety precautions: always unplug your printer and handle the drum with care to avoid damage.
II. Signs Your Brother Printer Drum Needs Cleaning
Recognizing when your drum needs attention can save you time and frustration. Here are some common signs that indicate it's time for a cleaning:
Faded or Streaky Prints: If your documents are coming out with uneven color or streaks, it's a clear sign that the drum needs cleaning.
Black Spots or Lines: Persistent spots or lines on your pages can indicate toner buildup on the drum surface.
Error Messages: Many Brother printers will display error messages related to drum maintenance when cleaning is necessary.
Ghosting: This phenomenon occurs when faint duplicate images appear on your prints, often due to toner residue on the drum.
III. Tools & Supplies Needed
Before you start cleaning, gather the following tools and supplies:
Lint-Free Cloth: A microfiber cloth is recommended to avoid scratching the drum.
Distilled Water or Isopropyl Alcohol: Use these to dampen your cloth for stubborn stains, but avoid harsh chemicals.
Cotton Swabs: Perfect for reaching tight spots and cleaning detailed areas.
Soft Brush (Optional): This can help remove excess toner dust from the printer.
IV. Step-by-Step Cleaning Guide
Step 1: Turn Off & Unplug the Printer
Safety first! Ensure that your printer is turned off and unplugged to prevent any electrical hazards or damage during the cleaning process.
Step 2: Open the Printer & Remove the Drum Unit
Locate the drum unit, which is typically found inside the toner cartridge assembly. Gently pull it out, following the instructions in your printer manual to avoid any damage.
Step 3: Clean the Drum Surface
Using a lint-free cloth, gently wipe the drum surface. Apply no excessive pressure to avoid scratching. If there are stubborn residues, lightly dampen the cloth with distilled water or isopropyl alcohol. For hard-to-reach areas, use cotton swabs to ensure a thorough clean.
Step 4: Remove Excess Toner Dust
With a soft brush, carefully clean the surrounding areas of the drum to remove any excess toner dust. Avoid blowing air into the drum, as moisture can lead to damage.
Step 5: Reinstall the Drum & Test Print
Once you've completed the cleaning, carefully place the drum back into the printer. It's time to run a test print to check if the print quality has improved.
V. Maintenance Tips to Extend Drum Life
To ensure your Brother printer drum lasts as long as possible, consider these maintenance tips:
Keep the Printer in a Cool, Dry Place: This helps prevent overheating and moisture damage.
Avoid Touching the Drum with Bare Hands: Oils from your skin can damage the drum surface.
Replace the Drum When Necessary: If cleaning no longer improves print quality, it may be time for a replacement.
Follow Brother's Recommended Drum Replacement Schedule: Regularly check the manufacturer's guidelines for optimal performance.
VI. When to Replace (Not Just Clean) the Drum
Sometimes, cleaning isn't enough. Here are signs that indicate it's time to replace the drum:
Persistent Print Quality Issues: If cleaning does not resolve your print problems, replacement may be necessary.
Visible Scratches or Damage: Inspect the drum surface for any physical damage.
"Replace Drum" Error Message: If your printer displays this message, it's time for a new drum.
VII. FAQs About Brother Printer Drum Cleaning
Can I use regular alcohol to clean the drum?
It's recommended to use 90% or higher isopropyl alcohol for effective cleaning.
How often should I clean the drum?
Depending on usage, cleaning every 3-6 months is advisable for heavy use.
Does cleaning the drum reset the drum counter?
No, the drum counter remains unchanged, and replacement is still needed when prompted.
Shop Affordable Compatible Drum Units at Zhuhai Prime Color Image Company
If cleaning your drum unit doesn’t fix the print quality issues or if your printer continues to show a drum error, it’s time for a replacement. At Zhuhai Prime Color Image Company, we provide high-quality compatible drum units at a significantly lower price compared to original OEM products.
Exceptional Page Yield: Our compatible drum units deliver the same page yield as Brother’s original products, ensuring reliable and long-lasting performance.
Competitive Pricing: Enjoy the same level of quality as OEM products, but at a more budget-friendly price, helping you save on printer maintenance costs.
Consistent Print Quality: Our drum units work flawlessly with toner cartridges, producing thousands of sharp, clear prints.
Easy Installation: Replacing a drum unit is as straightforward as swapping out an original drum—just remove the old unit, install the new one, and you’re ready to print.
Conclusion
Regular maintenance of your Brother printer's drum assembly is crucial for achieving optimal print quality and extending its lifespan. This guide provides you with effective cleaning techniques to keep your printer in top shape. If your drum is worn out and cleaning no longer enhances print quality, consider upgrading to a high-quality, cost-effective replacement from Zhuhai Prime Color Image Company.


